One of the bigger projects I had planned for this summer is to assemble a Printrbot Simple that I had ordered from Amazon at the end of last school year. The kit had been sitting in my house for a few weeks and finally, after all the trips and traveling and conferences were over, I found the time to sit down for a few days, turn on some crappy TV show on Netflix, and tinker with the kit.
I had been thinking of getting a 3D printer for my house for a while now and I specifically wanted to buy one I had to assemble. I thought that if I can build it, I would understand a lot better how they work and this would hopefully be helpful when the one in the lab acts up. Also, during the times when we have a backlog of prints queued up at school, I would be able to help out by doing some prints at home.
I was a bit intimated when I first opened the kit because there are A LOT of parts, many of which are tiny and can be easily lost. I decided to grab a tray I had lying around and sort all the tiny nuts and bolts on it, which helped the assembly process tremendously.
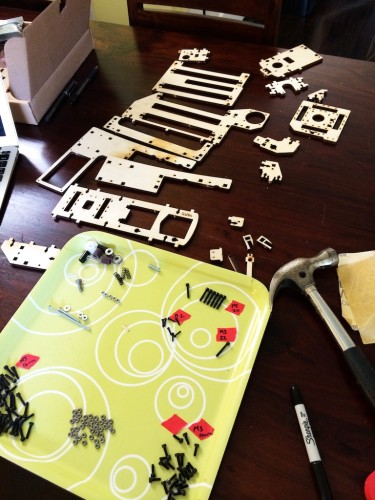
Once everything was sorted, I started going through the assembly instructions. I think the only major thing I did was to read through all the comments for each step by other folks before attempting it myself. The comments were really helpful to both clarify the instructions and to warn about tricky parts.
After a few days (working on it a few hours each day), I had an assembled printer!
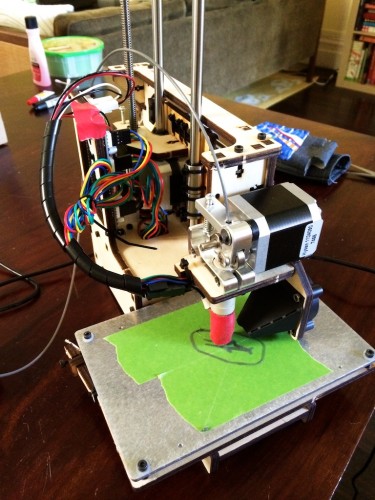
The photo above shows the printer already printing but truth be told, it took a few more troubleshooting steps before I could get it to print successfully.
- I had problems with some of the wires getting caught on the Acme rod when the Z-axis was getting adjusted. To keep the wires out of the way, I used some tape to hold down the wires and get them out of the way as much as possible.
- I first tested with just the metal bed and prints were just not sticking. We don’t have any blue painter’s tape in the house but we do have Frog Tape from our recent round of painting the stairs. This worked fine.
- I had to go through the recommended leveling process a few times before I could get the extruder nozzle at an appropriate height. I had first leveled with just the metal bed and forgot to re-level after putting down the painters tape. Even though the tape isn’t all that thick, the difference was enough. I could see the extruder nozzle actually pushing into the tape and carving lines onto it. Re-leveling again fixed it.
- There were multiple steps after installing Repetier, including using the right settings for the Printbot and updating Slic3r.
The biggest difference I can see from the user angle with Printrbot is that you have to do more things manually. For example, you have to set the extruder temperature and turn it on manually, watch the temperature curve until it reaches the proper temperature, and then start the print. Unlike the Makerbot we have in the lab, all of this isn’t automatically taken care for you. I don’t think this is a deal breaker in terms of putting Printrbots in the lab – it would just require more training before letting kids loose on them.