an interactive neuron

At CMK 2014, after I had just about run out of ideas of what else i can do with fabric speakers, I found out that my friend Aaron and his group were working on another e-textiles project and trying to figure out how to use Arduino to control a bunch of NeoPixels and lights. And they graciously allowed me to crash the party.

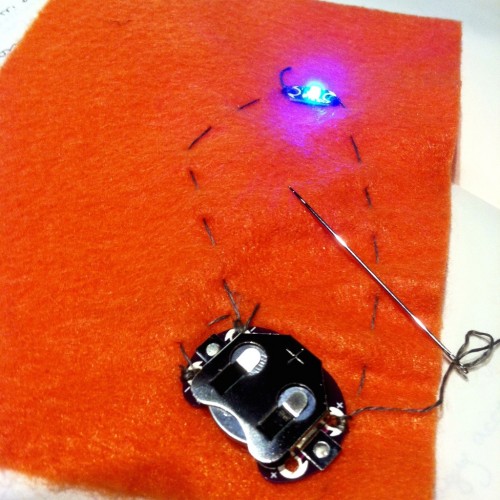
Their project idea was awesome – build an interactive representation of a neuron that will sense when someone is near by and “fire” action potentials accordingly. They had already done a lot of the soldering and sewing work, so it was time to jump into the Arduino coding – yay, my favorite! One tricky part of this project was that they couldn’t find enough NeoPixels to cover the whole neuron, so ended up using a combination of NeoPixels and regular LEDs. Each regular LED was connected to a PWM output pin of the Arduino (so that we can control brightness). All the NeoPixels were wired in series and connected to a single Arduino pin – I do love that you only need one pin to control a whole bunch of NeoPixels!

After much initial head-scratching and whining about the difficult of working with the NeoPixels Arduino library and the not-exactly-intuitive documentation, we finally pulled together code that works! When the ultrasonic sensor does not sense anyone (or any object really) nearby, the lights all along the neuron will twinkle and randomly fade on/off. When the sensor senses someone close by, it will trigger a “firing” pattern, starting from the axon terminal, propagating up the axon, and spreading through to the dendrites. If the person/object isn’t close enough, the firing pattern only goes partway up the axon. You can see all three cases in the video above.

And because we love sharing, here’s our Arduino code:

#include <Adafruit_NeoPixel.h>

#define PIN 6
#define NUMPIXELS 25
#define NUMNEO 20
#define ARRAYSIZE 10

#define echoPin 7 // Echo Pin
#define trigPin 8 // Trigger Pin


// records whether a pixel is currently on or off... 
// first batch is neopixels and then normal LEDs
int state[NUMPIXELS]; 

int LEDpins[5] = { 
  3, 5, 9, 10, 11}; // pin numbers for the non-neopixel LEDs

// during explosion sequence, this is the order the lights should light up in
int sequence[NUMPIXELS] = {
  0,1,2,3,20,21,22,23,24,4,5,6,7,8,9,10,11,12,13,14,15,16,17,18,19};
int vel=100;

// array to hold light sensor readings so we can keep an average
int sensorReadings[10];
long counter = 0;

// for ultrasonic sensor 
int maximumRange = 150; // Maximum range needed
int minimumRange = 0; // Minimum range needed
long duration, distance; // Duration used to calculate distance


// create neopixel strip object
Adafruit_NeoPixel strip = Adafruit_NeoPixel(NUMNEO, PIN, NEO_GRB + NEO_KHZ800);

void setup() {

  // set up the averaging array 
  counter = 0;
  for (int i=0; i< ARRAYSIZE; i++)  {
    sensorReadings[i] = 0;
  }

  strip.begin();
  clear_all();

  // set up ultrasonic pins
  pinMode(trigPin, OUTPUT);
  pinMode(echoPin, INPUT);

  Serial.begin(9600);
}


void loop() {

  // send pulses with ultrasonic sensor to detect distance
  digitalWrite(trigPin, LOW); 
  delayMicroseconds(2); 

  digitalWrite(trigPin, HIGH);
  delayMicroseconds(10); 

  digitalWrite(trigPin, LOW);
  duration = pulseIn(echoPin, HIGH);

  //Calculate the distance (in cm) based on the speed of sound.
  distance = duration/58.2;
  if (distance >= maximumRange || distance <= minimumRange){
   // Serial.println("out of range == TWINKLE!!");
    twinkle();
    counter = 0;
  }
  else {
    int thisIndex =  (counter % ARRAYSIZE);
    sensorReadings[thisIndex] = distance;
    counter++;

    // now calculate the average distance object is at
    int sum = 0;
    for (int i=0; i<ARRAYSIZE; i++) {
      sum += sensorReadings[i];
    }
    float average = sum/ARRAYSIZE*1.0;
      
    if (counter > 10) { // don't do anything until we've read 10 readings
     // convert average distance to number of LEDs to light
     float y = -1.0/12*distance + 32.0/3.0;
     clear_all();
     
     if (y >= 9.0) {
      explosion(24);
     } else {
       explosion((int) y);
     }
    }
  }
}


void explosion(int stop_point){
  strip.setBrightness(120);
  for (int i = 0; i<stop_point; i++){
    int lightIndex = sequence[i];
    if(lightIndex < NUMNEO){
      if(lightIndex < 4){
        strip.setPixelColor(lightIndex,255,255,255);
      }
      else{
        int r = random(255);
        int g = random(255);
        int b = random(255);
        strip.setPixelColor(lightIndex,r,g,b);
      }
      strip.show();
      delay(vel);
    }
    else {
      digitalWrite(LEDpins[lightIndex-NUMNEO], HIGH); 
      delay(vel);
    }
  }
  delay(1000);

  for (int i = stop_point; i>=0; i--){
    int lightIndex = sequence[i];
    if(lightIndex < NUMNEO){
      strip.setPixelColor(lightIndex,0,0,0);
      strip.show();
      delay(vel);
    }
    else {
      digitalWrite(LEDpins[lightIndex-NUMNEO], LOW); 
      delay(vel);
    }
  }
}

// random twinkling effect
void twinkle(){
  int pickMe = random(NUMPIXELS);
  strip.setBrightness(200); 

  if(state[pickMe]==1) { //fadeout
    fade_down(pickMe);
    state[pickMe] = 0;

  }
  else { //fadein
    fade_up(pickMe);
    state[pickMe] = 1;
  }
}

// fade the lights in
void fade_up(uint16_t u) {
  // pick a random color for the neo-pixels
  int r = random(255);
  int g = random(255);
  int b = random(255);

  for (int k=0; k<= 100; k++) { 
    if (u < NUMNEO) {
      strip.setPixelColor(u,k*r/100,k*g/100,k*b/100);
      strip.show();
      delay(5);
    } 
    else{
      analogWrite(LEDpins[u-NUMNEO], k*50/100);  
      delay(5);  
    }
  }
}

// fade the lights out
void fade_down(uint16_t u) {
  // figure out what color a neopixel is, if it's a neopixel
  uint8_t r,g,b;
  if (u< NUMNEO) {
    uint32_t c = strip.getPixelColor(u);
    r = (uint8_t)(c >> 16),
    g = (uint8_t)(c >>  8),
    b = (uint8_t)c;
  }
  for (int k=100; k>= 0; k--){ 
    if (u < NUMNEO) {
      strip.setPixelColor(u,k*r/100,k*g/100,k*b/100);
      strip.show();
      delay(5);
    } 
    else {
      analogWrite(LEDpins[u-NUMNEO], k*50/100);  
      delay(5);  
    } 
  }
}

// turn off all the lights, neo-pixels and normal LEDs
void clear_all() {
  for(int i=0; i<NUMPIXELS; i++){ //initialize strip off
    state[i]=0;
    if (i >= NUMNEO) {
      pinMode(LEDpins[i-NUMNEO], OUTPUT);
      digitalWrite(LEDpins[i-NUMNEO], LOW);

    } 
    else{ 
      strip.setPixelColor(i,0,0,0); 
    }
  }
  strip.show(); 
}
Continue Reading

a fabric speaker

Amongst the plethora of ideas at CMK 2014, one that stuck with me was the idea of wearable speakers, as I’ve been wanting for some time now to delve deeper into soft circuits and e-textiles. Specifically, I wanted to challenge myself to build actual speakers using simple materials instead of just embedding pre-made speakers into a wearable device. Although I didn’t have anyone to work with on this specific project, I ended up getting situated at a table of other folks working on individual projects, which gave me the best of both worlds: people to chat with/bounce ideas off of, yet total creative freedom in how I want to approach the project. (Which incidentally, is giving me ideas about the benefits of allowing students to opt to work by themselves on some projects.)

The first thing I did was to consult the interwebs to see if others had done similar projects and as is usually the case, someone also had this idea.  I first found this Instructables which gave me a great overview and also led me to this page with even more ideas and examples. Although I’ve taught electromagnetism in my engineering classes before, it still never fails to delight me when I get to build something using magnets and wire that will actually work!

With some research under my belt, I was ready to start prototyping. Although I didn’t have access to the exact types of conductive threads my references used, there were conductive yarn and the other types of conductive threads at the conference, so I decided to play with those. A quick measurement with the multimeter told me that the yarn had much higher resistance, so I opted to work with the conductive thread instead.

IMG_1547

My first prototype is the orange one of the left, where I sewed conductive thread into a spiral onto a small piece of felt. When I place it over a super strong magnet (courtesy of Jaymes) and put my ear really close to it, I can just make out the sound.  But given how large the magnet had to be (you can see it at the top of the photo and how literally anything sort of magnetic just get stuck to it Katamari-style), it didn’t exactly seem reasonable for wearable applications.

For my second iteration (magenta one in the middle), I used the same general idea but patiently tried to sew a tighter spiral to see if that would increase the output enough to be audible with just a small disc magnet or two – no luck. Upon further research, I realized that the example fabric speakers I saw all went through a simple amplifier circuit, for which I don’t have the parts. That meant conductive thread might be a dead end until I get home when I can order the chip I need to build an amplifier circuit.

So for my third iteration (black version on the right), I decided to forego the conductive thread altogether and just use normal magnet wire because it has an insulating coating which allows you to coil the wire over itself many many times over, thus creating a much stronger magnetic field. (Sadly, you can’t do that to conductive thread because the whole surface of the thread is conductive.) At this point, I had also gotten tired of my testing protocol of twisting very fine wires together, so I decided to sew snaps onto my speaker (you can see them on the photo above) and solder the other sides to my deconstructed earphones to make a better testing platform. I had to take a pair of cheapo airplane headphones apart in order to get a jack to connect to my computer/iPhone.

IMG_1548

This iteration actually worked ok when paired with two little disc magnets that I duct-taped onto a stretchy piece of fabric, especially when you add a stiff piece of paper onto the whole thing as a membrane that will push the air more effectively. It’s nothing that will rock your socks off but if you hold the whole thing up to your ear or if you are in a quiet room (which is hard to find at CMK), you can actually hear the music! 🙂 And actually, if you hook this up to an amplifier (which again, Jaymes had), it will be quite booming…at least until the wire gets so hot that it melts the felt and the whole thing starts smoking! Exciting!

IMG_1552

In the photo above, you can see that I added a small resistor to the coil just to make sure the speaker will have about 10Ω of resistance – supposedly, if speakers have lower resistance than 8Ω (which is what normal pre-made speakers are), it can mess up your audio source. I don’t know if this is absolutely true but I certainly wasn’t about to risk my computer or phone to test this out!

One idea that came to me while I was working on this last version was if there’s a way to coil up conductive materials like the wire to create a bigger magnetic field, so I tried to make a version where I sandwiched a long strip of conductive fabric in between non-conductive fabric and rolled the whole thing up. Cool idea, right? TOTAL FAIL! Ah well, it was worth a try!IMG_1551


Continue Reading

a constructionist party

One of the conferences I’ve been most looking forward to attending this year is Constructing Modern Knowledge, an annual gathering where educators are challenged to take off their teacher hats, and become learners and makers themselves. This being my first year attending, I only had very vague ideas of what to expect. I knew that day one would consist of the full group throwing out ideas for potential projects and the resulting chaos of 100+ adults signing up for projects they might be interested in working on. Amongst other things (like oh, I don’t know, an incredible cast of faculty and fellows, a ridiculous amount of toys and gadgets to play with, etc etc), I was really impressed by the variety of project ideas and how willing everyone was to work on things they either don’t know anything about or that don’t relate at all to what they teach.

I talk about the two projects I worked on in two other posts: fabric speakers and an interactive neuron. So here, I’ll simply talk about what I took away from these four intensive days of making (other than fabric speaker prototypes, awesome videos and photos, and lots of wonderful new people to connect with):

  • It’s good to give teachers time to be selfish and just do projects for themselves that don’t need to directly relate to their day jobs. (And really, isn’t that true for just about everyone?) Many times, the teachers themselves will find ways to tie what they’re working on back to things they can do in the classroom anyway. Encourage playfulness, whimsy, and controlled chaos.  The question now becomes: How might I incorporate this philosophy into some of the teacher training we do during the school year back at Casti?
  • You need large chunks of uninterrupted, unscheduled time to really get into the flow of making. I know this isn’t exactly realistic for most schools but I wonder if there are still ways to redesign schedules to allow for this type of deep dive every so often. (Related to this, I sure hope I get selected to be on our schedule redesign committee back at school this year because I definitely have things to say now!)
  •  I enjoyed having the freedom to work by myself when I wanted to and want to give my students this choice too. Granted, I also think the ability to collaborate effectively is a critical life skill, so most likely, a balance should be struck: required group work for some projects, optional for others.

My last take-away? I sure hope my school will send me back again next year. There are so many more toys and gadgets I’d love to play with!

Continue Reading

a jittery bot

I love leaving the lab open after school on Fridays because it’s a nice relaxing time when everyone can take some out to make something before the weekend. At least, that’s the idea.

What really happens is that on most Fridays, there is decent enough attendance, especially from some of our 6th graders, that I find myself running around helping everyone instead of making something myself. BUT I am absolutely not complaining because the alternative of no one coming to Bourn Fridays would be much much sadder.

Anyway, what this means is that when there is that Friday when attendance is minimal and the only kids here are those who know the lab inside and out, I will absolutely take advantage and play around myself. Like this Friday, I got to tinker around with this little guy:

I’ve had this project pinned on our lab’s Pinterest page forever and it feels good to finally get some time to make one!

Continue Reading

a lot of soldering and a LoL shield

After much patient soldering (made worse because of OCD nature of yours truly), the LoL shield is finally up and running! These assembly instructions were superb, especially the video on how to straighten all the LEDs for maximum OCD-ness.

It doesn’t last super long on a 9V battery (unsurprisingly) but it was enough to help me advertise the Valentine Day’s edition of Bourn Fridays. On top of that, I now kind of know what “charlieplexing” means!

Continue Reading

a light-up whale

I was at FabLearn the last couple of days and one of the highlights was definitely the soft circuits workshop I took. Even though we had only a short amount of time, many of us teachers were determined to finish a stuffed animal project that would light up.

Here’s my little light-up whale:
IMG_0872

The whale was one of the standard patterns given to us and I thought that as a former electrical engineer, I would blast right through it. Ha! Yeah, right! Turns out sewing circuits is a LOT different from breadboard, which my mind is way more used to. I can’t tell you how many times I had to undo the stitches and start over.

Looking back, I really should have sat down and drawn out the circuit paths before I jumped into sewing. Once I started sewing, I kept forgetting which path was supposed to connect with which side of which component and kept getting myself confused. If I ever do soft circuits with kids, I will definitely insist they do some planning first!

Continue Reading

a little motor

Success! The little motor kit I bought from RAFT has finally been put to the test!

It zips along pretty nicely but it’s probably a bit complicated to use if we want students to really understand the essentials of how to use electromagnetic interactions to generate movement. Something a lot simpler would work a lot better to strip away any “magic” and allow us to focus on the physics. For example, something like this or this.

Continue Reading

a way to measure curiosity

Last week, I got to get away from school for a couple of days to attend FabLearn, a conference on digital fabrication in education hosted by our collaborators, Dr. Paulo Blikstein and his lab at Stanford. I met so many interesting people and got to play with various cool toys, including things like TinkerCAD (a simple, easy to use 3D design app on the web with what seems to be some social networking functions as well as upgrades for extending their library of forms with JavaScript), Fritzing (software tool to help with teaching and sharing of electronic circuit designs), and Arduinos (yay!!). I was extremely honored to be asked to be part of the educators panel and the best part for me was meeting my fellow panelists, all of whom are doing such exciting things in this space, e.g. Hack the FutureAthenian School, Castanheiras School in Brazil, and Beam Camp.

The conference gave me so many ideas for projects, collaborations, and ways of thinking about incorporating building and tinkering in K-12 education. If I had to pick one thing that really resonated with me, I would say it has to be the research of Dr. Sherry Hsi from Lawrence Hall of Science. She is working on finding a way to measure and assess curiosity!

In a talk I went to many years ago, Dr. Jeff Goldstein of the National Center for Earth and Space Science Education talked about how science is really just a way to organize curiosity. And now, in almost all of projects we do in our lab, I want kids to wonder about things – how something works, why it works that way, can it work any other way, etc etc. So if there is a way to measure curiosity, that would be an incredible way to assess whether the projects we do and the way we teach is really having the desired effect of making kids more curious. The next step is then empowering them to go one step further and teaching them the tools to satisfy that curiosity, whether by doing research, building prototypes, or what not.

Dr. Hsi talked about a type of study they did where they gave kids cameras and asked them to record everything they wonder about throughout the day. At the end of each week, they looked through the pictures and reflected on what they were curious about. Over the course of months, they can track how curiosity fluctuates and they are also trying to find ways to distinguish different types of curiosity, e.g. how something works and why something doesn’t make sense versus specific facts.

Other highlights from the conference:

  • many cool projects coming out of Mike Eisenberg’s Craft Tech lab at Univ of Colorado, including physical input devices for 3D modeling, 3D printing using kid-friendly materials (like chocolate!!)
  • being introduced to the amazing metal sculptures of Bathsheba Grossman
  • Howtosmile.org
  • the discussion about how to create equitable spaces for tinkering where everyone gets to participate (versus the moms holding jackets problem)
  • instead of aiming for the highest technical level of some project, there is a lot of learning even in the more whimsical and low tech projects
  • LEDs as “gateway drugs”
  • cool products like Tangles (3D Tangrams), DrawBot, Midas, Hummingbird, etc

I am wildly inspired by all that I saw/played with/heard and all the people I met. Can’t wait until next year!

Continue Reading

a start of something new…

After too many years in grad school and brief stints as a part-time lecturer at assorted universities in the Bay Area, I’m now embarking on a new journey as the director of a tinkering studio at an independent, all-girls school down in the peninsula. Next year, I hope to be able to say that I’m also teaching engineering at this same school. There is already so much to do, so many toys to play with, and I truly cannot be more excited to be in this new position –  new not only to me but to the school!

I have so, so much to learn which of course is one of the things I love most about teaching in the first place. Signing up to be a teacher is really signing up to be a lifelong student. This is my attempt to record what I’m learning, what I’m inspired by, and what I’m thinking about along the way. But I reserve the right to sometimes, just post cute photos of my cat – don’t say I didn’t warn you.

Teaching at the high-school level wasn’t something I had planned on. In fact, up until about a year ago, I didn’t even think of it as possible career option. A bunch of random events – attending a TEDx conference where I met a really awesome former high school history teacher, Castilleja finding me at a hiring conference even though I didn’t know a job like mine existed and had only registered for science teaching positions – brought me to where I am now.

Of course, the most exciting and rewarding paths are the unforeseen ones, right? I can’t wait!

Continue Reading